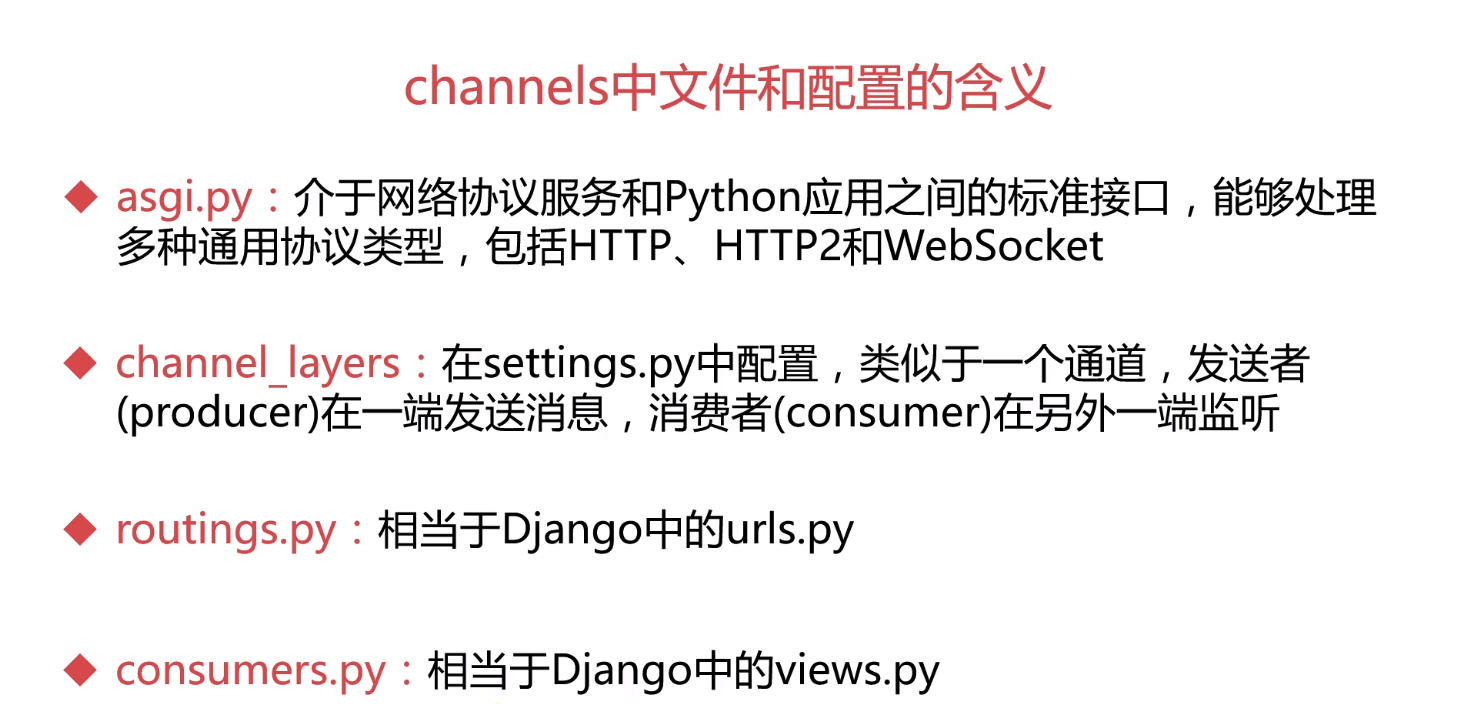
说明:
初步了解WebSocket之后,看看如何在Django中实现WebSocket
Django本身不支持WebSocket,但可以通过集成Channels框架来实现WebSocket
Channels是针对Django项目的一个增强框架,可以使Django不仅支持HTTP协议,还能支持WebSocket,MQTT等多种协议,同时Channels还整合了Django的auth以及session系统方便进行用户管理及认证。
在做深度学习平台3.0的项目中,我用到了Websocket,下面是我当时使用的Python和Django版本:
- python==3.6
- django==2.0.13
- channels==2.0.2
- channels_redis==2.1.1
这里,我不仅安装了Channels 2.0,还安装了channels_redis作为Channels的后端存储通道层。
配置之前,放两张图,便于理解:

1、下载好后把channels作为 Django 的一个应用,添加到配置文件的INSTALLED_APPS中。
- my_project/settings.py
INSTALLED_APPS = [
    'django.contrib.admin',
    'django.contrib.auth',
    'django.contrib.contenttypes',
    'django.contrib.sessions',
    'django.contrib.messages',
    'django.contrib.staticfiles',
    # Djagno是同步框架不支持WebSockets,channels则是异步框架主要用于扩展Django HTTP以外的协议。
    # 比如 WebSockets, chat protocols, IoT protocols 等等。遵循ASGI规范。
    # https://channels.readthedocs.io/en/latest/
    'channels',
    # Django定时任务,用来更新金额
    'django_apscheduler',
    # 项目自身app
    'tasks',
]
2、建立我的 asgi 应用,并指定其要使用的路由。在settings同级目录下新建一个routing.py的文件:
- my_project/routing.py
from django.urls import path
from django.conf.urls import url, include, re_path
from channels.routing import ProtocolTypeRouter, URLRouter
from tasks.consumer import MessagesConsumer, ImagesConsumer, WebSSHConsumer
# 用于Websocket认证, 集成了CookieMiddleware AuthMiddleware SessionMiddleware
from channels.auth import AuthMiddlewareStack
from channels.security.websocket import AllowedHostsOriginValidator
# self.scope['type'] 获取协议类型
# self.scope['url_route'] ['kwargs']['username']获取url中关键字参数
# channels routing是scope级别的, 一个连接只能由一个consumer接收和处理
# chaneels routing.py处理应用中WebSockets的路由,相当于Django中的urls.py
application = ProtocolTypeRouter({
    # 'http':views, 普通的http请求不需要我们手动在这里添加, 框架会自动加载。
    'websocket':AllowedHostsOriginValidator(AuthMiddlewareStack(
        URLRouter([
        url(r'^users/isinsufficient$',MessagesConsumer), # 6.10
    ])))
})
3、需要在 Django 的配置文件中继续配置Channels的asgi应用和通道层的信息:
- my_project/settings.py
# WebSockets channels layers传输缓存,现存在Redis的3库中。
CHANNEL_LAYERS = {
    "default": {
        "BACKEND": "channels_redis.core.RedisChannelLayer",
        "CONFIG": {
            "hosts": ["redis://127.0.0.1:6379/3"],
        },
    },
}
# Django运行需要更改为ASGI,用来支持HTTP以外的协议。
ASGI_APPLICATION = 'DeepLearningtaskscopy.routing.application'4、Channels需运行于ASGI协议上,所以要新建一个asgi.py
- my_project/asgi.py
"""
ASGI entrypoint. Configures Django and then runs the application
defined in the ASGI_APPLICATION setting.
"""

import os
import django
from channels.routing import get_default_application

import sys
# Build paths inside the project like this: os.path.join(BASE_DIR, ...)
BASE_DIR = os.path.dirname(os.path.dirname(os.path.abspath(__file__)))
sys.path.insert(0, BASE_DIR)
sys.path.insert(0, os.path.join(BASE_DIR, 'apps'))

os.environ.setdefault("DJANGO_SETTINGS_MODULE", "DeepLearningtaskscopy.settings")
django.setup()
application = get_default_application()到这里,Channels的基本配置就差不多了
下面我就来实现深度学习3.0如何主动通知用户余额不足的:
在 routing 文件中,我定义了一个websocket的路由列表,并设定了MessagesConsumer这个消费类(理解成Django的view)。这个 routing 文件就是上面 my_project/routing.py 中引用到的路由。
5、consumer的实现:
- my_project/apps/app/consumer.py
from channels.consumer import SyncConsumer, AsyncConsumer
from channels.generic.websocket import AsyncWebsocketConsumer, WebsocketConsumer
from asgiref.sync import async_to_sync,sync_to_async
from channels.db import database_sync_to_async
from kubernetes.stream import stream
from threading import Thread
from apps.tasks.tools import *
from tasks.models import Pod
from tasks.deep_learning_job import CreateDeepLearningJob
import json
# scope ASGI接口规范定义 类似 request

# chaneels consumer.py处理应用中WebSockets请求相当于Django中的views.py
class MessagesConsumer(AsyncWebsocketConsumer):
    '''
    协程处理余额提醒应用中websocket请求
    '''
    async def connect(self):
        '''
        连接websocket
        '''
        request_session = self.scope['session']
        if not request_session.get('userId'):
            # 未登录用户拒绝连接
            await self.close()
        else:
            await self.channel_layer.group_add(str(request_session.get('userId'))+'isInsufficient',self.channel_name)
            # @database_sync_to_async
            # def get_username(id):
            #     return User.objects.get(id=id)
            # await get_username(1)
            await self.accept()

    async def receive(self, text_data=None, bytes_data=None):
        '''
        将接收到的消息通过websocket主动发送给前端
        '''
        print(text_data)
        await self.send(text_data=json.dumps(text_data))

    async def disconnect(self, code):
        '''
        断开websocket
        '''
        request_session = self.scope['session']
await self.channel_layer.group_discard(str(request_session.get('userId'))+'isInsufficient',self.channel_name)主要的思路就是通过websocketurl进入这个MessagesConsumer,定义connect,receive,disconnect这3个方法。
触发connect事件以后,进入函数,self.scope可以类比的理解为django中的self.request,从这里面判断用户是否合法。合法后,加入group组,我以id+str取名。一个用户就是一个组。接受请求进入receive事件,将接收到的消息通过websocket主动发送给前端,如果断开链接就进入disconnect事件,退出这个组。
Channels引入了一个layer的概念,channel layer是一种通信系统,允许多个consumer实例之间互相通信,以及与外部Django程序实现互通。
channel layer主要实现了两种概念抽象:
channel name: channel实际上就是一个发送消息的通道,每个Channel都有一个名称,每一个拥有这个名称的人都可以往Channel里边发送消息
group: 多个channel可以组成一个Group,每个Group都有一个名称,每一个拥有这个名称的人都可以往Group里添加/删除Channel,也可以往Group里发送消息,Group内的所有channel都可以收到,但是无法发送给Group内的具体某个Channel
了解上边的概念就可以理解其中的代码了。
6、判断用户合法后就添加到这个组里面,以后可以调用group_send方法往这个组发送消息,每个用户就相当于一个组。我要判断这个用户余额不足,就可以主动发送到这个组中,那么只能他一个人收到,其他人收不到,我是加在了djagno的signals这个方法里。
- my_project/utils/signals.py
from asgiref.sync import async_to_sync
from channels.layers import get_channel_layer
from django.db.models import signals
from django.dispatch import receiver

from tasks.models import User, Volume
from tasks.tools import get_two_float, SendEmailMessage

print("触发signals方法,监控用户是否要欠费")

@receiver(signals.post_init, sender=User)
def Change_user_init(instance, **kwargs):
    instance.old_isInsufficient = instance.isInsufficient


@receiver(signals.post_save, sender=User)
def Changes_user_post(instance, created, **kwargs):
    if not created and instance.old_isInsufficient != instance.isInsufficient:
        payload = {
            'type':'receive',
            'isInsufficient:':instance.isInsufficient,
            'balance':float(get_two_float(instance.money,2))
        }
        channel_layer = get_channel_layer()
        async_to_sync(channel_layer.group_send)(str(instance.id)+'isInsufficient',payload)
        if instance.isInsufficient == True and instance.role == 2:
            print('发送邮件提醒用户-余额不足')
            SendEmailMessage(
                instance.id,
                "【机器学习平台3.0】通知",
                """<div>尊敬的{},您好!<br>
                您的账户有作业或卷在运行中,按此消耗下去,不到三天余额将用完,请您<b>尽快充值</b>!</div>""".format(
                    instance.name
                )
            )
思路:User中只要余额不足的字段从False变为True,就向那个用户所在的组发送一段websocket信息,并发送邮件给他。
注意,我consumer这个方法是异步的,signals方法是同步的,Channels对于异步的支持是非常好的。
异步需要把Consumer继承的WebsocketConsumer修改为AsyncWebsocketConsumer
所有的方法都修改为了异步defasync def
用await来实现异步I/O的调用
要记住视图中异步的话都用异步,同步的话都用同步。
好了,现在一个完全异步且功能完整的websocket就已经构建完成了 Enjoy it !
开封站胡同100元左右的a0cz.cn